Set up free Cloudflare CDN for your website today.
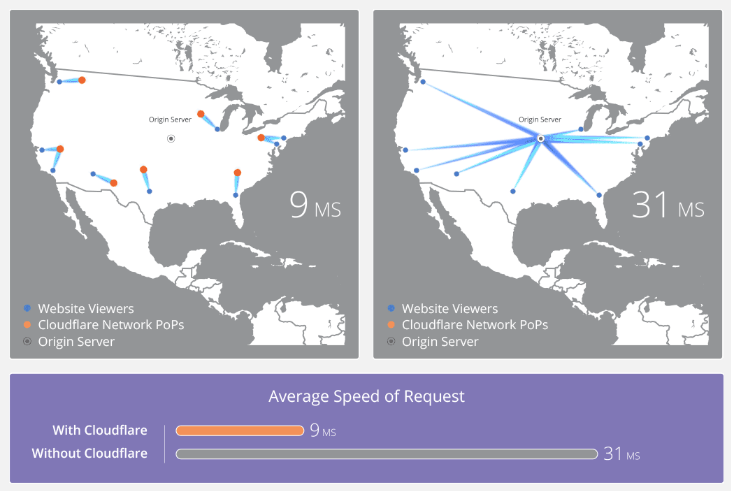
 CDN – Content Delivery Network, is a system of distributed servers (network), that deliver pages and other Web content to a user, based on the geographic locations of the user.
This service basically helps in loading your web pages very fast by serving your users the data from its nearest server location.
They are also said to provide, protection from large surges in traffic and also gives your website the basic security protection.
They are many CDN providers out there, some of them are mentioned below.
CDN – Content Delivery Network, is a system of distributed servers (network), that deliver pages and other Web content to a user, based on the geographic locations of the user.
This service basically helps in loading your web pages very fast by serving your users the data from its nearest server location.
They are also said to provide, protection from large surges in traffic and also gives your website the basic security protection.
They are many CDN providers out there, some of them are mentioned below.
 So, let us find out…


 Finally, check your website and also login into your WordPress dashboard to make sure everything is fine.
Note: In rare cases, DNS will take some time, say a maximum of 4 hours to update the nameservers and point the domain towards the same. So, don’t panic if your website is not showing up or if you’re unable to login into your WordPress dashboard.
If you have any trouble you can comment down below or even contact us on Social Media and we will be happy to help you.
So, that’s it for this post.
Additional Information: Google chrome has already started marking websites with HTTP has “Not secure”. This will affect your website traffic as well as SEO. So get your website an SSL certificate to move from HTTP to HTTPS.
Don’t worry if you don’t a budget. Cloudflare provides the basic version of SSL for free.
Click here to find out “How to get free SSL Certificate using Cloudflare?“.
Don’t delay.
Read more Hosting reviews and Hosting comparisons on Whyhostwithme to make the right decision and get the perfect host for your website.
Also, check out our Blog page to learn more about hot topics like WordPress, Webhosting, Domains, SEO, etc.
Finally, check your website and also login into your WordPress dashboard to make sure everything is fine.
Note: In rare cases, DNS will take some time, say a maximum of 4 hours to update the nameservers and point the domain towards the same. So, don’t panic if your website is not showing up or if you’re unable to login into your WordPress dashboard.
If you have any trouble you can comment down below or even contact us on Social Media and we will be happy to help you.
So, that’s it for this post.
Additional Information: Google chrome has already started marking websites with HTTP has “Not secure”. This will affect your website traffic as well as SEO. So get your website an SSL certificate to move from HTTP to HTTPS.
Don’t worry if you don’t a budget. Cloudflare provides the basic version of SSL for free.
Click here to find out “How to get free SSL Certificate using Cloudflare?“.
Don’t delay.
Read more Hosting reviews and Hosting comparisons on Whyhostwithme to make the right decision and get the perfect host for your website.
Also, check out our Blog page to learn more about hot topics like WordPress, Webhosting, Domains, SEO, etc.

CDN – Content Delivery Network, is a system of distributed servers (network), that deliver pages and other Web content to a user, based on the geographic locations of the user.
This service basically helps in loading your web pages very fast by serving your users the data from its nearest server location.
They are also said to provide, protection from large surges in traffic and also gives your website the basic security protection.
They are many CDN providers out there, some of them are mentioned below.
- Cloudflare
- Rackspace
- Amazon Web Services
- NetDNA
- Incapsula
So, let us find out…
How to Set Up Free Cloudflare CDN for your website?
Step by step with no step skipped Below I have mentioned all the steps with a lot of images, which also has annotations. In case you are stuck somewhere in the process do comment down below or contact us on our social media handles.Surf into Cloudflare official website and sign up for an account
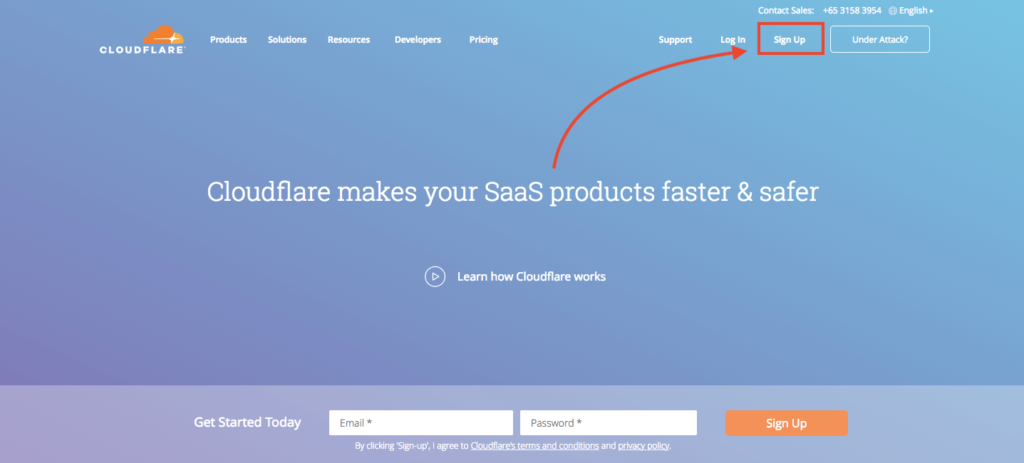
- Go to Cloudflare’s official website and click sign up.
- Enter your email address and the password you would like to use.
- Check for opting emails (Recommended) so, that you will be informed when Cloudflare has to communicate something.
- Click on Create account.
- You might have to confirm your email address from your mail handle.
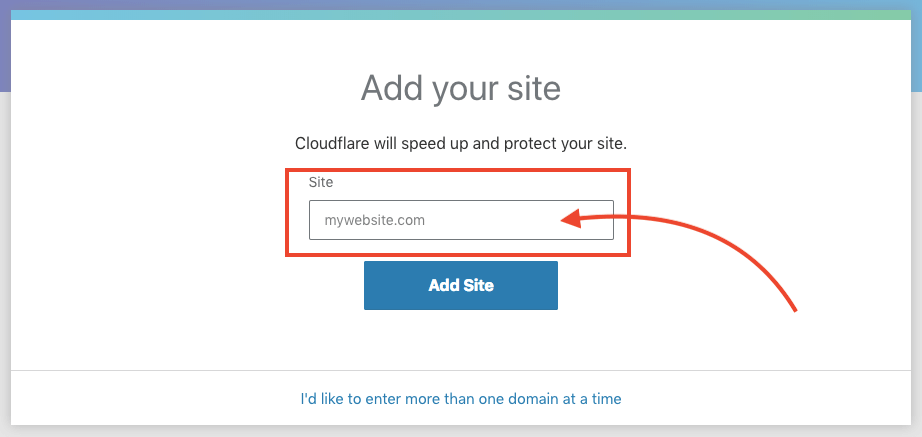
Add your site to Cloudflare
- In this step, add your domain name in the space provided and click on add site button.
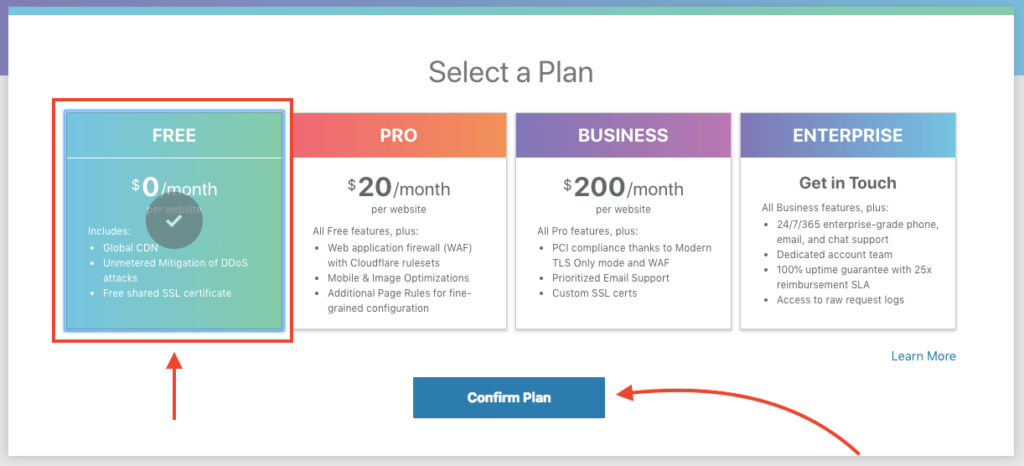
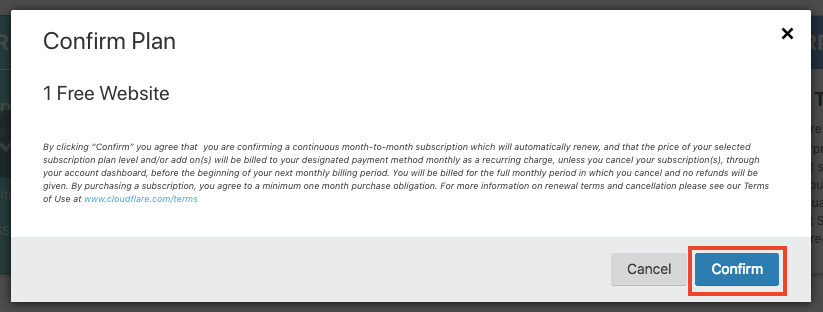
- Now Cloudflare will ask you to select one of their plans.
- I would recommend you to use the free plan to start with and later upgrade it when necessary.
- Confirm your plan in the next window.
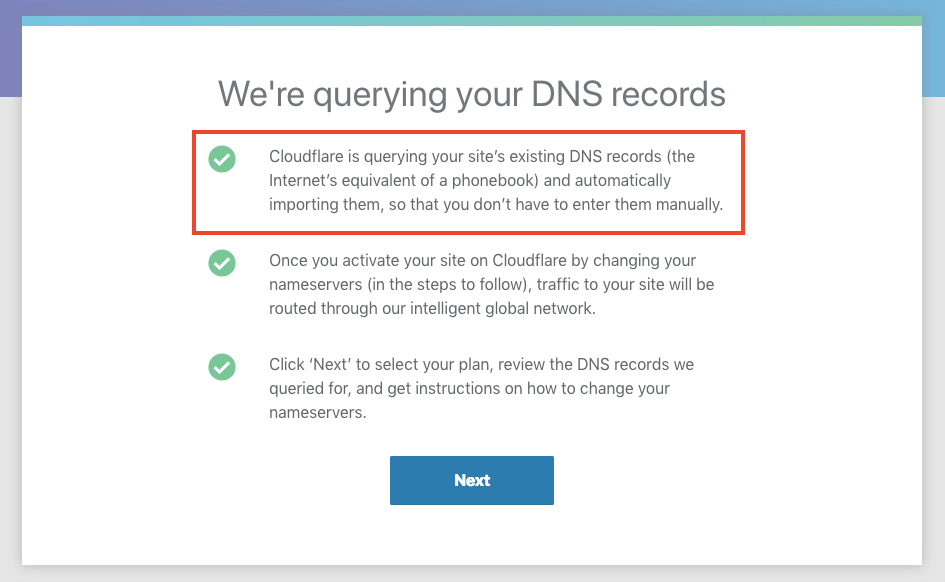
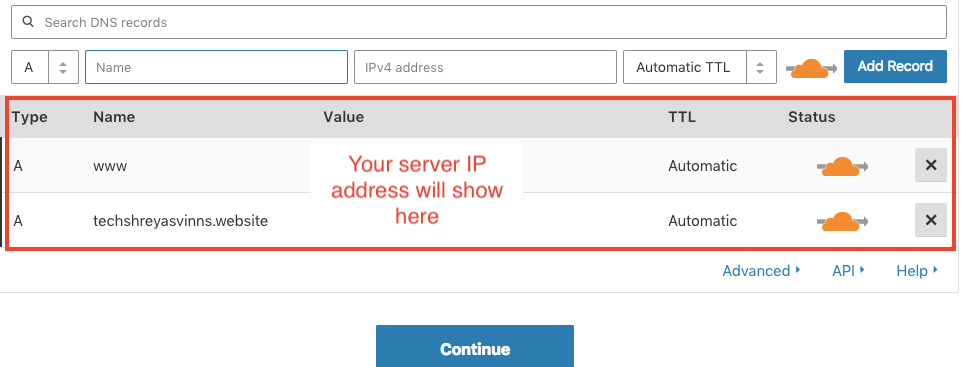
Setting up DNS records in Cloudflare
- Cloudflare automatically tries to fetch certain records for your domain like “A” records.
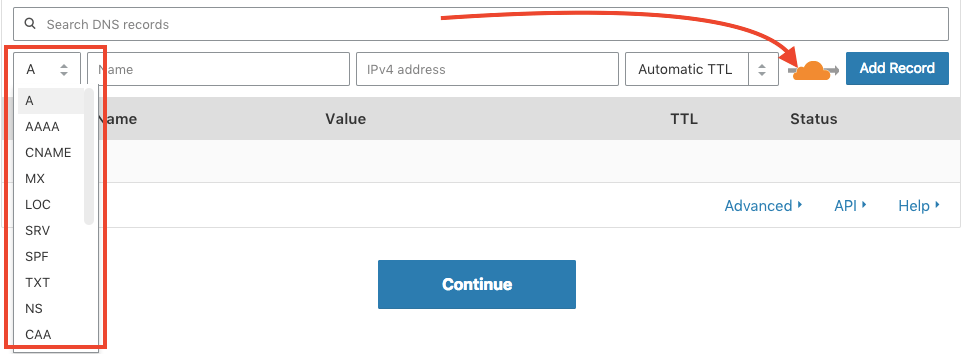
- If it doesn’t fetch, then you can always add it manually as shown in the images below.
- If you check the drop-down menu, you can see few records such as A, AAA, TXT, MX, CNAME, etc;
- MX, TXT records are for mail handles. If you’re into email marketing you will have to deploy the MX and other mail records here.
- As of now, you can concentrate on just “A” records.
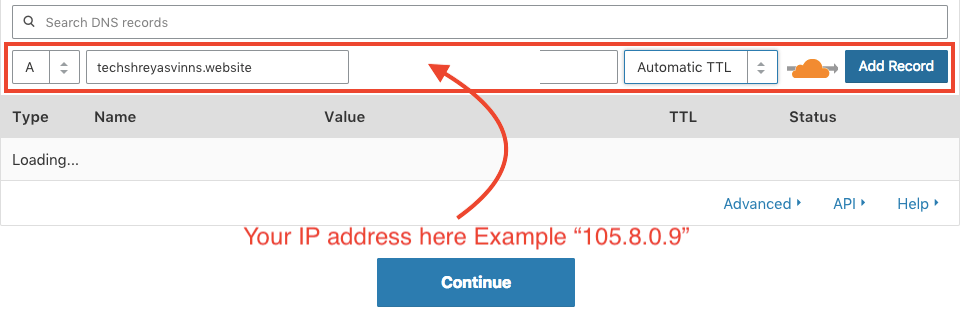
- “A” record basically means the server IP address to which your domain name must point so that the browser can fetch your website files from the server.
- So, go to web hosting C-panel and get your IP address from there and fill in the box as shown in the images.
- Set “A” records for both “www” version and also “non- www” version.
- Once every record has been added, click on “Continue”.
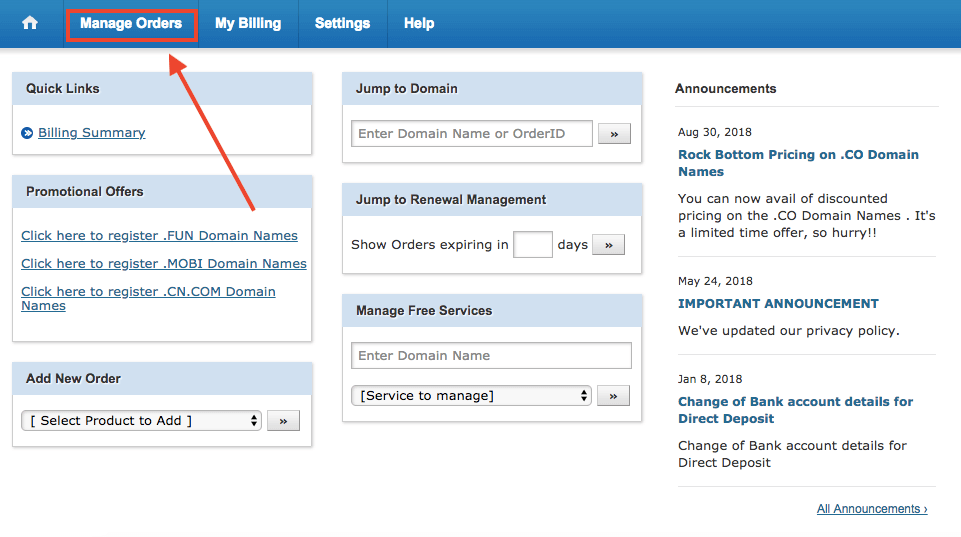
Changing Nameservers
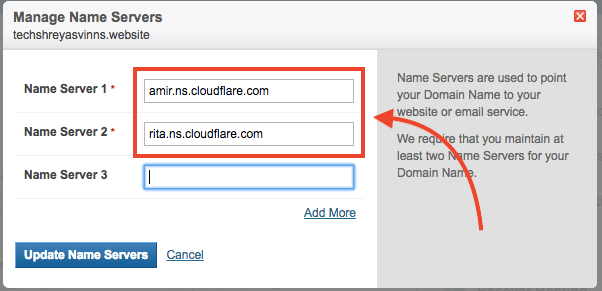
- In the next step, Cloudflare will give you their nameservers as shown below.
- You will have to copy these nameservers and deploy it in your DNS records from where you have bought the domain.
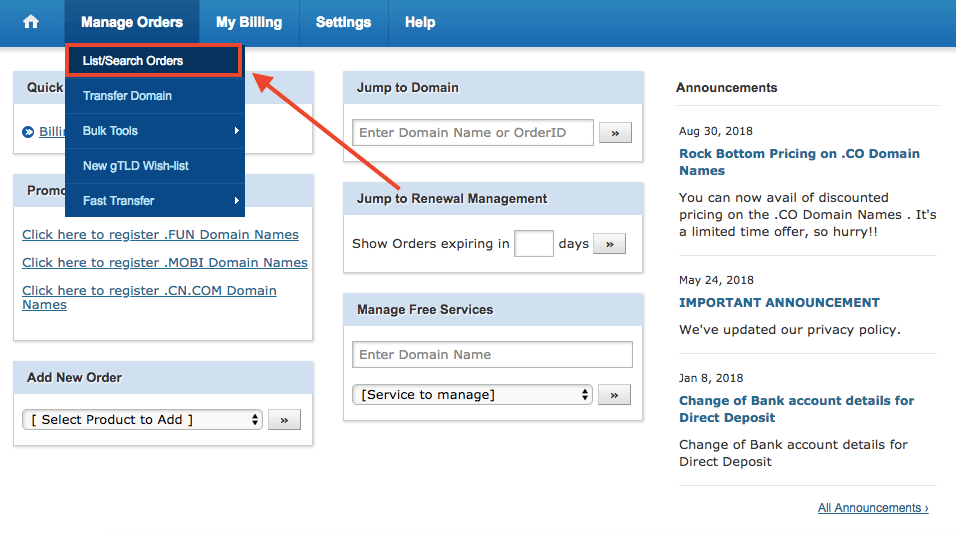
- This option might vary accordingly with your Domain Provider. In this demo, I’ll be showing you Hostgator’s DNS as an example.
- If you find any trouble finding your nameservers option in your DNS, comment down below with the name of your Domain Provider and we’ll be happy to help you or else you can also contact your Domain provider and they’ll guide you.
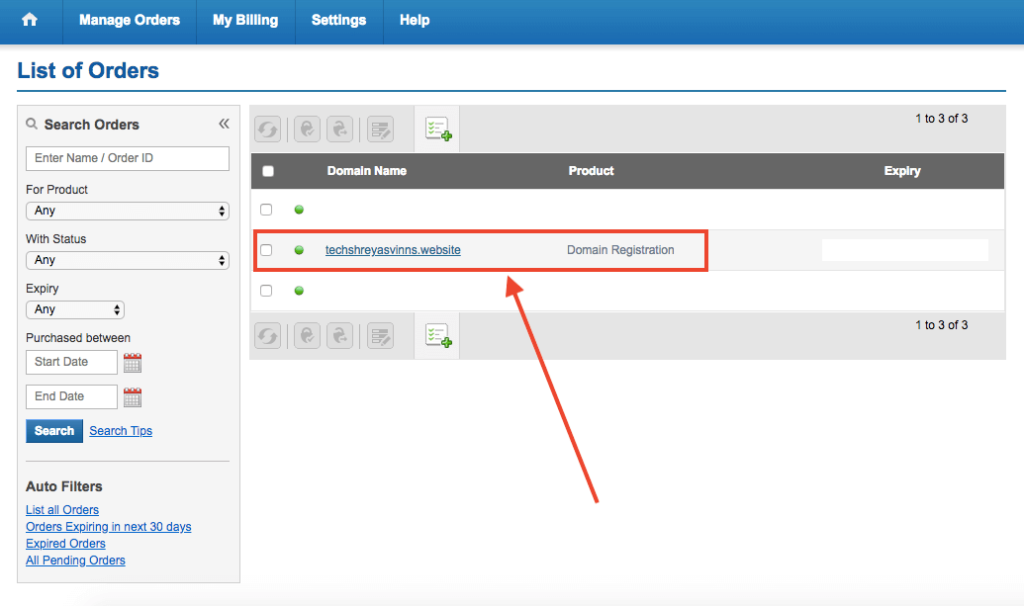
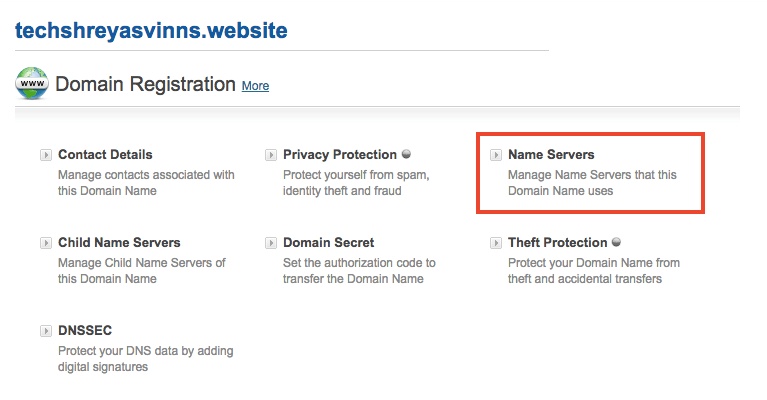
- Find your domain under the orders list.
- Click on Nameservers option.
- And deploy the copied Cloudflare nameservers into this field and save changes.
Verifying the changes
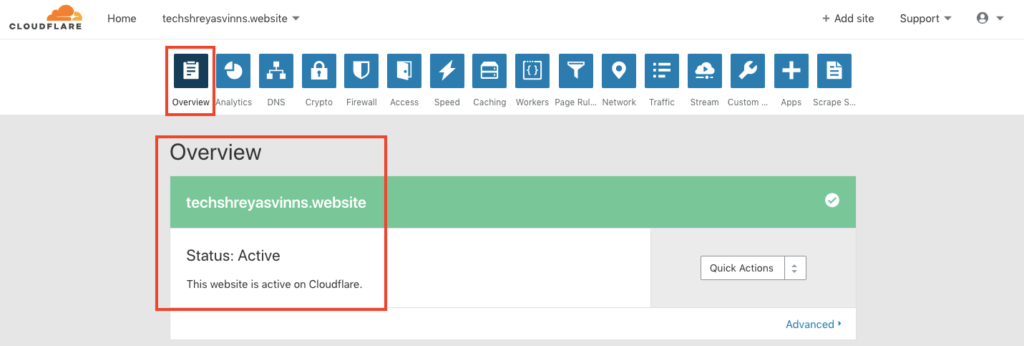
- Now go to your Cloudflare dashboard and navigate to the Overview tab.
- Check the status and see if it’s showing “Active”.
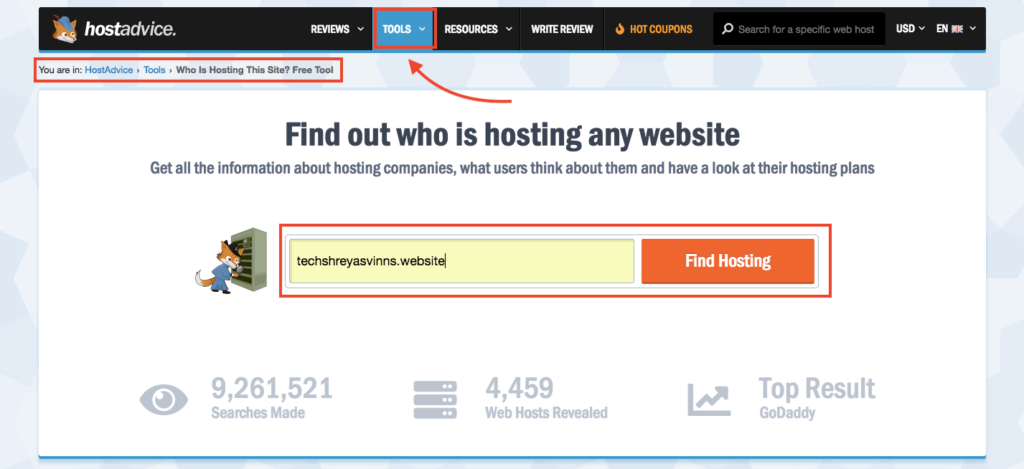
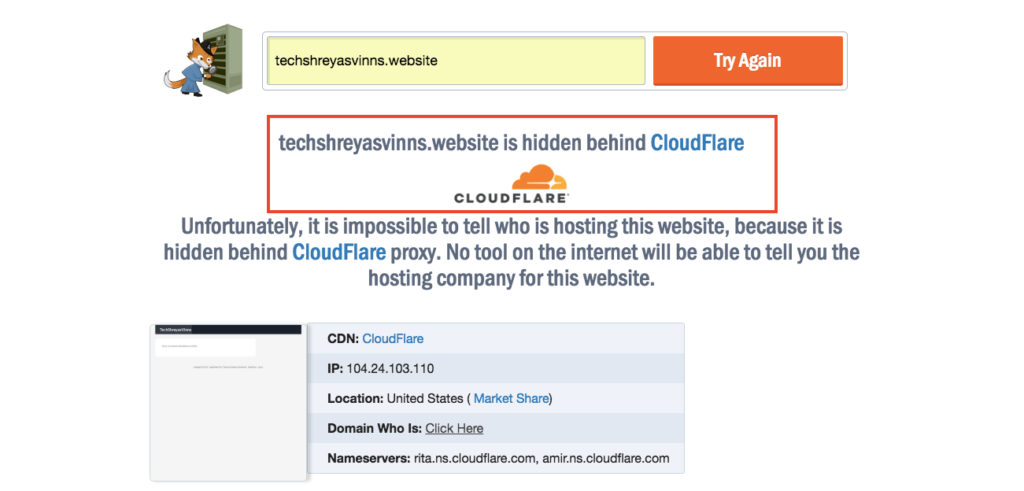
- To double check things, head over to Hostadvice website and under tools find the who is hosting option.
- Enter your domain name and hit “Find Hosting”.
- If Cloudflare has been set up properly it’ll show that the domain is hidden behind Cloudflare.
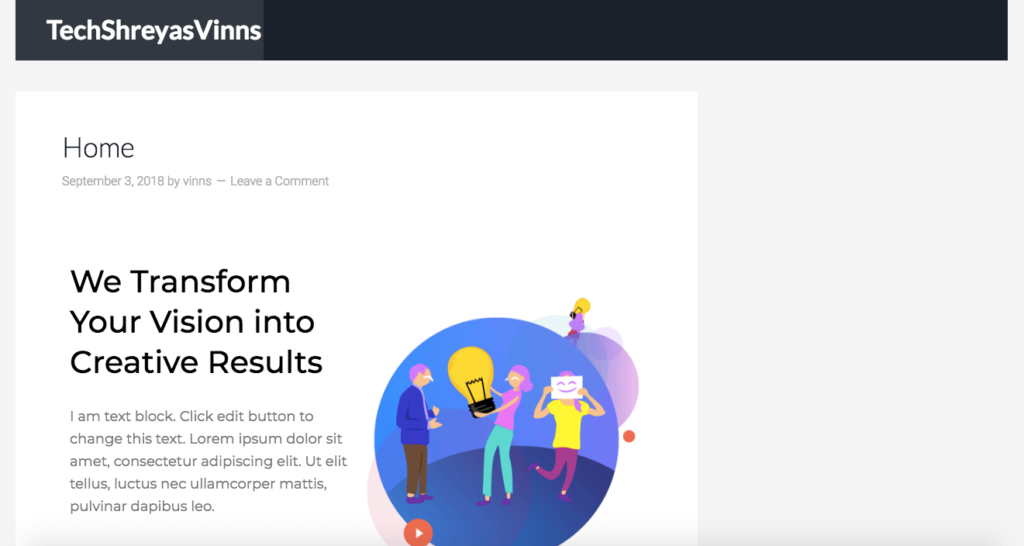
Finally, check your website and WordPress dashboard
Finally, check your website and also login into your WordPress dashboard to make sure everything is fine.
Note: In rare cases, DNS will take some time, say a maximum of 4 hours to update the nameservers and point the domain towards the same. So, don’t panic if your website is not showing up or if you’re unable to login into your WordPress dashboard.
If you have any trouble you can comment down below or even contact us on Social Media and we will be happy to help you.
So, that’s it for this post.
Additional Information: Google chrome has already started marking websites with HTTP has “Not secure”. This will affect your website traffic as well as SEO. So get your website an SSL certificate to move from HTTP to HTTPS.
Don’t worry if you don’t a budget. Cloudflare provides the basic version of SSL for free.
Click here to find out “How to get free SSL Certificate using Cloudflare?“.
Don’t delay.
Read more Hosting reviews and Hosting comparisons on Whyhostwithme to make the right decision and get the perfect host for your website.
Also, check out our Blog page to learn more about hot topics like WordPress, Webhosting, Domains, SEO, etc.
[maxbutton id=”1″ url=”https://whyhostwithme.com/category/blog/” text=”Check our Blog” nofollow=”false” ]
Thank you, Have a wonderful day.


4 Replies to “How to Set Up Free Cloudflare CDN for your website?”
Paid certificafes provide greater security.
Yes, they do but for beginners, free SSL is more than enough to start with.
🙂
SSL certificate prices differs from company to business.
SSL certificate rates varies from company to company.
Comments are closed.